-
Shop
- Advanced Technologies
- AI Skills for Creators & Freelancers
- AI Client Management
- AI Ethics
- AI Mindset
- AI Tools & Prompts
- AI Writing & Content Creation
- Audio, Voice & Music
- Design & Visual Creation
- Email, Messaging & Communication
- Freelancing & Business
- Marketing, Ads & Conversion
- Productivity, Workflow & Automation
- SEO & Search Optimization
- Social Media Content & Growth
- Strategy, Planning & Analytics
- Video Creation & Editing
- AI Skills Mastery 2026 Collection
- Bathroom
- Best-Sellers
- Car Accessories
- Confidence
- Dating & Social Skills
- Digital Resources
- Easter Products
- Education & Learning
- Family & Parenting
- Fashion
- Fashion Accessories
- Furniture
- Gadgets
- Health & Beauty
- Health & Wellness
- Home & Garden
- Home Electronics
- Home Supplies
- Jewelry
- Kids & Babies
- Kitchen
- Lighting
- Patio, Lawn & Garden
- Personal Growth
- Pet Care
- Pet Supplies
- Pets
- Shoes
- Smart Home Living Guides
- Sport & Outdoors
- Stress Relief & Relaxation
- Super Deals
- TikTok Growth & Monetization Mastery
- Travel
- Travel & Adventure
- Wealth
- Wellness
Polish Leather Shoes at Home: A Simple Shine Checklist
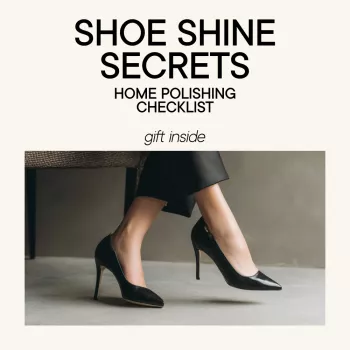
Shoe Shine Secrets: Home Polishing Checklist – How to Polish Leather Shoes at Home
A reliable home shine comes down to preparation, thin layers, and the right drying time—not brute-force buffing. When you treat polishing like a simple checklist, you get consistent results: cleaner color, smoother-looking leather, and a protective finish that’s easier to maintain week after week. For more guidance, see Shoe polish – Wikipedia.
What a Great Shine Actually Does (and Doesn’t)
A good polish job is mostly optical and preventative. It makes leather look better by smoothing out what you see on the surface, and it helps slow down damage from everyday wear. For further reading, see Banana Peel Shoe Polish | Pioneering The Simple Life.
- Restores appearance by filling tiny surface scratches and evening out the finish.
- Adds a protective layer that helps reduce water spotting and salt staining.
- Conditions leather when paired with a conditioner (polish alone is not a moisturizer).
- Does not repair cracked leather, peeling coatings, or deep gouges—those need repair products or a cobbler.
- Works best when done regularly in light sessions rather than occasional heavy build-ups.
For material-specific standards and care chemistry, the American Leather Chemists Association (ALCA) is a solid reference point. For repair guidance and professional care norms, the Shoe Service Institute of America (SSIA) is another trustworthy resource.
Home Polishing Checklist: Gather Tools and Set Up
You don’t need a giant kit—just the right basics and a clean workflow. Set up on a towel or paper to catch residue, and keep a small cup of water nearby for a light mist or a slightly damp cloth.
- Soft horsehair brush (or a clean polishing brush) for dusting and final buffing
- Two cloths: one for applying product, one dedicated to final buff (old cotton T-shirts work well)
- Leather cleaner or saddle soap (optional but helpful if shoes have grime or old wax layers)
- Leather conditioner/cream (especially for dry leather or winter wear)
- Wax polish or cream polish matched to shoe color (neutral works, but color-matched hides scuffs better)
- Cotton swabs or a small detailing brush for seams, welts, and tight areas
- A shoe tree (ideal) or tightly rolled paper to hold the shape while working
At-a-Glance Checklist (Quick vs Deep Shine)
| Step | Quick Refresh (5–10 min) | Deep Shine (20–35 min) | Notes |
|---|---|---|---|
| Remove laces / insert shoe trees | Optional | Yes | Prevents polish from staining laces; holds shape |
| Brush off dust | Yes | Yes | Brush welt edges and around eyelets |
| Clean if needed | Light wipe | Cleaner/saddle soap | Let fully dry before conditioning |
| Condition | Optional | Yes | Thin layer; wait 10–15 minutes |
| Apply polish | 1 thin coat | 2–3 thin coats | Thin beats thick; avoid heavy build-up in creases |
| Set time | 2–5 minutes | 5–10 minutes between coats | Rushing causes smears and dull patches |
| Buff | Yes | Yes | Brush briskly; finish with cloth for extra gloss |
| Detail edges/welt | Optional | Yes | Use a swab/brush to control product |
Step-by-Step: How to Polish Leather Shoes at Home
This routine works for most smooth leather dress shoes and boots. If you’re working on suede or nubuck, skip wax/cream polish and use products made for those nap finishes.
- Prep: Remove laces on dress shoes and insert shoe trees (or stuff toes firmly) to smooth the surface.
- Dry brush: Use a horsehair brush to remove dust and grit that can scratch during polishing.
- Clean (when needed): If there is visible grime, old wax haze, or salt stains, use a damp cloth or leather cleaner; work gently and allow to dry completely.
- Condition (recommended for most leather): Apply a small amount of conditioner/cream, spread thinly, and let it absorb; buff lightly to remove excess so polish can adhere evenly.
- Apply polish: Using a clean cloth wrapped around your fingers, dab a small amount and spread in small circles using very thin layers—especially over the vamp where creasing occurs.
- Let it set: Allow the layer to haze; this is when buffing becomes effortless and streak-free.
- Buff: First with a brush (fast, light pressure), then with a clean cloth to refine the gloss.
- Repeat lightly: Add another thin coat only if needed for deeper color and smoother shine.
- Finishing touches: Detail the welt and seams carefully; wipe any polish from stitching or uppers where it shouldn’t sit.
Scuffs, Scratches, and Salt: Fast Fixes That Look Professional
Common Mistakes That Ruin the Finish (and How to Avoid Them)
Care Rhythm: How Often to Clean, Condition, and Shine
Shop Helpful Picks
If you want a ready reference you can keep open during your next shine session, the checklist guide is available here: Shoe Shine Secrets: Home Polishing Checklist – How to Polish Leather Shoes at Home.
For everyday wear, a clean upper still benefits from routine brushing and spot cleaning—especially around seams and edges. Take a look at Armani Exchange Men’s Sneakers for a polished, street-ready option.
A Handy Printable-Style Checklist for the Next Shine
FAQ
Is it better to use cream polish or wax polish at home?
Cream polish is ideal for color revival and blending minor scuffs, while wax polish is best for higher gloss and a protective top layer. A practical routine is cream first, then a thin wax finish on top.
How long should polish dry before buffing?
Wait until the surface hazes and feels dry to the touch—often 2–5 minutes for a thin layer, longer in humid rooms. Buffing too soon is the main cause of smears and dull patches.
Can leather shoes be over-polished?
Yes. Too much wax build-up can crack in creases, look cloudy, and attract dirt; use thin layers and periodically clean off old wax before restarting with light coats.
Recommended for you


Was this article helpful?
Yes
No







Leave a comment