-
Shop
- Advanced Technologies
- AI Skills for Creators & Freelancers
- AI Client Management
- AI Ethics
- AI Mindset
- AI Tools & Prompts
- AI Writing & Content Creation
- Audio, Voice & Music
- Design & Visual Creation
- Email, Messaging & Communication
- Freelancing & Business
- Marketing, Ads & Conversion
- Productivity, Workflow & Automation
- SEO & Search Optimization
- Social Media Content & Growth
- Strategy, Planning & Analytics
- Video Creation & Editing
- AI Skills Mastery 2026 Collection
- Bathroom
- Best-Sellers
- Car Accessories
- Confidence
- Dating & Social Skills
- Digital Resources
- Easter Products
- Education & Learning
- Family & Parenting
- Fashion
- Fashion Accessories
- Furniture
- Gadgets
- Health & Beauty
- Health & Wellness
- Home & Garden
- Home Electronics
- Home Supplies
- Jewelry
- Kids & Babies
- Kitchen
- Lighting
- Patio, Lawn & Garden
- Personal Growth
- Pet Care
- Pet Supplies
- Pets
- Shoes
- Smart Home Living Guides
- Sport & Outdoors
- Stress Relief & Relaxation
- Super Deals
- TikTok Growth & Monetization Mastery
- Travel
- Travel & Adventure
- Wealth
- Wellness
Modern Room Divider Checklist: Plan Partitions That Work
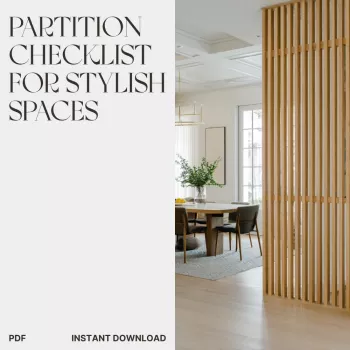
The Partition Checklist for Stylish Spaces: A Printable Guide to Separating Rooms with Modern Partitions
Partitions can make a home feel larger, calmer, and more intentional—without committing to full construction. Whether the goal is to create a work nook, hide entryway clutter, or add privacy in a studio, a smart divider keeps the room bright, functional, and cohesive. Use the planning steps below to choose the right partition type, size it correctly, and avoid the most common layout missteps.
What a Partition Should Solve (Before Choosing a Style)
Start with function. A beautiful divider that doesn’t support daily life quickly turns into an obstacle.
- Define the job: privacy, zoning, storage, acoustics, light control, or visual structure.
- Map routines: where coats land, where laptops open, where guests gather, and where mess collects.
- Confirm existing boundaries: rugs, lighting, or furniture placement may already “divide” the room well enough.
- Set constraints: rental rules, drilling limits, ceiling height, airflow needs, and pet/kid durability.
- Decide permanence: movable, semi-fixed, or built-in—then shop accordingly.
For safety and livability, keep access and exit paths clear, especially in tighter homes. If you’re planning around accessibility or wider clearances, reference the ADA Standards for Accessible Design for guidance.
Partition Types and Where They Work Best
- Open shelving: creates a boundary plus storage; ideal for living/dining splits and studio zoning. Watch for visual clutter.
- Screens and folding panels: flexible and rental-friendly; great for temporary privacy (sleeping nook, Zoom corner).
- Slatted wood or metal dividers: lets light move through while adding architectural rhythm; a strong match for modern interiors.
- Curtains and track systems: soft separation with high privacy potential; heavier fabric improves sound absorption.
- Half walls (pony walls): keeps openness while blocking sightlines; works well behind sofas to define a zone.
- Glass partitions: maintains brightness and a clean, modern feel; consider frosted or reeded glass for privacy.
- Room divider cabinets/wardrobes: high-impact storage + separation; confirm floor load and anchoring needs.
Quick Match Guide: Goals → Best Partition Options
| Goal | Best options | Watch-outs |
|---|---|---|
| Add privacy without losing light | Reeded/frosted glass, slatted divider, curtain on ceiling track | Glare, cleaning needs, track installation |
| Hide clutter and add storage | Open shelving, divider cabinet | Visual clutter, tipping risk—anchor when needed |
| Create a work zone in a living area | Screen, slatted divider, shelving with closed bins | Background noise, cable management |
| Separate entry from living space | Slatted divider, half wall, slim console + screen combo | Traffic bottlenecks, door swing conflicts |
| Improve acoustics a bit | Curtains, upholstered panels, bookcase with backing | True soundproofing needs construction |
Sizing and Placement Rules That Keep Spaces Comfortable
- Maintain clear paths: aim for 30–36 in (76–91 cm) for main walkways; go wider in high-traffic pinch points.
- Check sightlines: stand at key viewpoints (entry, sofa, kitchen) and confirm what should be concealed or highlighted.
- Let light travel: favor slats, glass, or open shelving near windows; reserve solid options deeper in the plan.
- Anchor to something: align the divider with rug edges, pendant lights, ceiling beams, or furniture lines for a built-in look.
- Balance height: full-height partitions change perceived volume; half-height dividers define zones while keeping airiness.
- Plan outlets and cables: decide where power, chargers, and task lighting will live before committing to placement.
Also consider airflow and indoor comfort—especially if you’re dividing a larger room into smaller zones. The EPA’s indoor air quality guidance is a helpful reference when planning ventilation and avoiding “stale corners” behind tall dividers.
Materials, Finish, and Styling for a Modern Look
- Choose a consistent palette: repeat one metal finish or wood tone across the divider and nearby fixtures.
- Use texture intentionally: slats for rhythm, glass for sleekness, textiles for softness, shelving for layered depth.
- Keep shelf dividers curated: mix closed storage with a few sculptural objects; leave breathing room to avoid chaos.
- Match opacity to function: transparent for brightness, translucent for privacy, opaque for hiding utilities or storage.
- Add lighting to “officially” zone: a focused task lamp or pendant reinforces the separated area as its own destination.
Printable Checklist: Step-by-Step Planning Workflow
If you want a fast, repeatable way to plan dividers without second-guessing measurements, clearances, and styling, use The Partition Checklist for Stylish Spaces (printable guide) to walk through the process room by room. Here’s the workflow it follows:
Common Partition Mistakes (and Quick Fixes)
When to Use a Partition vs. Furniture-Only Zoning
Shop Useful Add-Ons (In Stock)
- The Partition Checklist for Stylish Spaces | Printable Home Design Guide
- Universal Car Steering Wheel Phone Mount for Safe Navigation
- Triple-Sided Ultra-Fine Soft Bristle Toothbrush for Enhanced Oral Health
FAQ
What is the easiest partition for a rental apartment?
Folding screens, tension-rod curtains, and freestanding shelving are typically the easiest because they can be installed with little to no drilling. If you use tall shelving, prioritize stability and consider anti-tip measures even in rentals.
How tall should a room divider be to create privacy without making the room feel smaller?
For partial privacy, many spaces do well with dividers around 60–72 inches tall, which block direct sightlines while keeping the room open. Full-height dividers create stronger separation, but slats or glass help maintain brightness and a larger feel.
Do partitions help with sound?
Most partitions reduce noise only slightly because sound travels over and around them. Curtains, upholstered panels, and bookcases with a solid backing can help more, while true soundproofing usually requires sealed, built construction.
Recommended for you



Was this article helpful?
Yes
No









Leave a comment