-
Shop
- Advanced Technologies
- AI Skills for Creators & Freelancers
- AI Client Management
- AI Ethics
- AI Mindset
- AI Tools & Prompts
- AI Writing & Content Creation
- Audio, Voice & Music
- Design & Visual Creation
- Email, Messaging & Communication
- Freelancing & Business
- Marketing, Ads & Conversion
- Productivity, Workflow & Automation
- SEO & Search Optimization
- Social Media Content & Growth
- Strategy, Planning & Analytics
- Video Creation & Editing
- AI Skills Mastery 2026 Collection
- Bathroom
- Best-Sellers
- Car Accessories
- Confidence
- Dating & Social Skills
- Digital Resources
- Easter Products
- Education & Learning
- Family & Parenting
- Fashion
- Fashion Accessories
- Furniture
- Gadgets
- Health & Beauty
- Health & Wellness
- Home & Garden
- Home Electronics
- Home Supplies
- Jewelry
- Kids & Babies
- Kitchen
- Lighting
- Patio, Lawn & Garden
- Personal Growth
- Pet Care
- Pet Supplies
- Pets
- Shoes
- Smart Home Living Guides
- Sport & Outdoors
- Stress Relief & Relaxation
- Super Deals
- TikTok Growth & Monetization Mastery
- Travel
- Travel & Adventure
- Wealth
- Wellness
Mobile Paint Drying Rack: Adjustable Hooks, Swivel Wheels
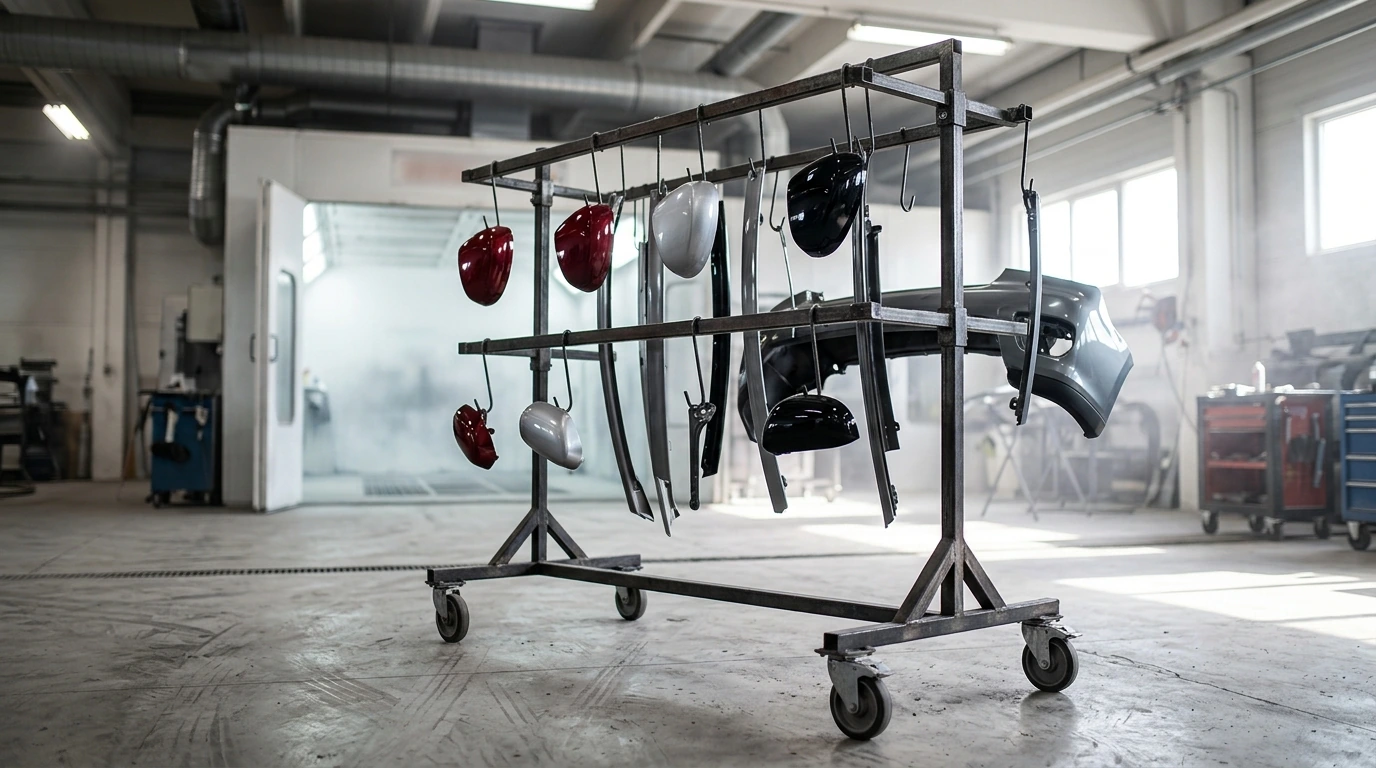
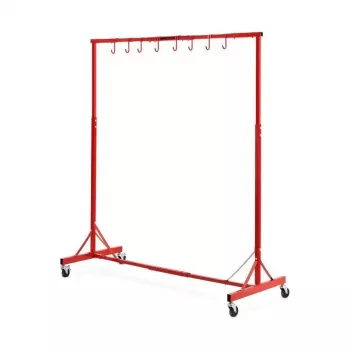
Heavy-Duty Automotive Painting Drying Rack with Adjustable Hooks & Swiveling Wheels
Fresh paint is most vulnerable when it looks “done.” A bumper cover that brushes a cart, a mirror cap that lands edge-down on a bench, or a trim piece that catches dust while curing can quickly turn a clean refinish into time-consuming rework. A purpose-built, mobile drying rack keeps panels and parts elevated, separated, and organized so airflow can do its job while hands stay off the finish.
The Heavy-Duty Automotive Painting Drying Rack with Adjustable Hooks & Swiveling Wheels is designed for the realities of busy garages and body shops—where booth time is limited, parts move between stations, and a single accidental touch can cost hours.
What This Drying Rack Helps Solve in a Paint Workflow
Refinishing often falls apart in the “in-between” moments: after spraying, during flash time, while relocating parts, or when the booth needs to turn over quickly. A dedicated drying rack helps remove common failure points without adding complicated steps.
- Keeps painted parts off the floor and away from overspray fallout, reducing rework.
- Creates spacing between components so airflow can reach edges and recessed areas.
- Supports a smoother flow from prep to booth to drying area by rolling the load instead of carrying parts.
- Helps prevent imprinting and fingerprints by minimizing handling during cure time.
Key Build Features That Matter Day to Day
Not all racks behave the same once they’re loaded. The details—hook adjustability, wheel behavior, and frame stability—are what determine whether parts stay safe from the booth to the cure zone.
- Heavy-duty frame for repeated use in busy garages and body shops.
- Adjustable hooks to accommodate different part shapes and mounting points.
- Swiveling wheels for maneuvering around stalls, lifts, and spray areas.
- Multi-part capacity to dry several items at once while keeping clearance between surfaces.
When you can dial in hook spacing, you spend less time improvising with wire, tape, or makeshift stands—and more time keeping edges clean and consistent.
Capacity, Layout, and Best-Use Scenarios
This style of rack shines for smaller to mid-size components that hang securely and benefit from clean airflow around all sides. It’s especially useful when your workflow includes batching: prime multiple parts, spray them as a set, then let them flash and cure together without stacking.
- Ideal for smaller to mid-size parts that can hang securely: trim pieces, mirrors, spoilers, brackets, and similar components.
- Useful for staged batches: prime a set of parts, hang to flash, then move as a group for curing.
- Reduces bottlenecks when booth time is limited by letting parts cure off to the side without stacking.
For shops that juggle multiple jobs, the ability to roll parts out of the main spray area can help keep the booth available—without leaving freshly sprayed pieces vulnerable on a bench or cart.
At-a-Glance Setup Checklist
A few consistent habits make a drying rack safer and more predictable, especially when it’s fully loaded and moving through tight aisles.
| Step | What to Do | Why It Helps |
|---|---|---|
| Position | Place rack on level ground; keep away from main walkways | Reduces tip risk and accidental contact |
| Adjust hooks | Set hook height/spacing before loading parts | Prevents bumping wet edges while reconfiguring |
| Load & balance | Hang one part at a time; check stability and clearance | Avoids swinging contact and finish damage |
| Move carefully | Roll slowly; avoid thresholds and tight turns when loaded | Limits vibration and part-to-part touch |
| Cure zone | Allow airflow around parts; keep dust sources away | Improves curing consistency and surface quality |
Using Adjustable Hooks for Different Automotive Parts
Adjustable hooks are more than convenience—they’re a way to control part orientation, clearance, and stability. The goal is to hang from strong points and position painted faces so they’re protected from traffic and accidental bumps.
- Use wider spacing for parts with overhangs (e.g., mirror shells) to prevent edge-to-edge contact.
- Angle hooks so gravity pulls parts into a stable resting position instead of letting them swing.
- Hang parts by existing mounting holes or sturdy brackets; avoid clipping directly onto fresh edges.
- Group by cure stage: freshly painted items separated from pieces that are already tack-free.
Mobility and Wheel Performance in a Shop Environment
For shop safety and finishing quality, follow recognized guidance for spray operations and curing areas, including OSHA’s spray finishing standard and NIOSH safety recommendations: OSHA 29 CFR 1910.107 and NIOSH Spray Painting.
Care, Storage, and Safety Notes
Product Snapshot
- Name: Heavy-Duty Automotive Painting Drying Rack with Adjustable Hooks & Swiveling Wheels
- Price: $90.01 (USD)
- Availability: In stock
If you’re refining your overall shop flow, pairing finishing organization with simple driver-safety accessories can also help day-to-day operations. For example, keeping navigation hands-free around the lot or between vendors is easier with a compact mount like the Universal Car Steering Wheel Phone Mount for Safe Navigation.
FAQ
How long should painted parts stay on a drying rack before handling?
Follow the paint system’s technical data sheet for flash, tack-free, and full-cure times, since temperature and humidity can significantly change results. Even when a part feels dry to the touch, waiting longer before assembly helps prevent imprinting, edge marks, and hardware witness lines.
Can the rack be used for parts other than automotive panels?
Yes—any hangable item that benefits from separated airflow (such as coated brackets, small fabrication pieces, or painted hardware) can be a good fit. Confirm the part can hang from a strong point without slipping, and keep hooks clean to avoid surface marking.
What’s the best way to prevent parts from swinging or touching each other?
Increase hook spacing, hang parts from stable mounting holes, and distribute weight evenly with heavier items lower on the rack. Move the rack slowly and smoothly, and ensure each piece has clear space around edges and corners before rolling.
Recommended for you
Was this article helpful?
Yes
No









Leave a comment