-
Shop
- Advanced Technologies
- AI Skills for Creators & Freelancers
- AI Client Management
- AI Ethics
- AI Mindset
- AI Tools & Prompts
- AI Writing & Content Creation
- Audio, Voice & Music
- Design & Visual Creation
- Email, Messaging & Communication
- Freelancing & Business
- Marketing, Ads & Conversion
- Productivity, Workflow & Automation
- SEO & Search Optimization
- Social Media Content & Growth
- Strategy, Planning & Analytics
- Video Creation & Editing
- AI Skills Mastery 2026 Collection
- Bathroom
- Best-Sellers
- Car Accessories
- Confidence
- Dating & Social Skills
- Digital Resources
- Easter Products
- Education & Learning
- Family & Parenting
- Fashion
- Fashion Accessories
- Furniture
- Gadgets
- Health & Beauty
- Health & Wellness
- Home & Garden
- Home Electronics
- Home Supplies
- Jewelry
- Kids & Babies
- Kitchen
- Lighting
- Patio, Lawn & Garden
- Personal Growth
- Pet Care
- Pet Supplies
- Pets
- Shoes
- Smart Home Living Guides
- Sport & Outdoors
- Stress Relief & Relaxation
- Super Deals
- TikTok Growth & Monetization Mastery
- Travel
- Travel & Adventure
- Wealth
- Wellness
Build a Mini Electric Guitar: 3D Wooden Puzzle Kit
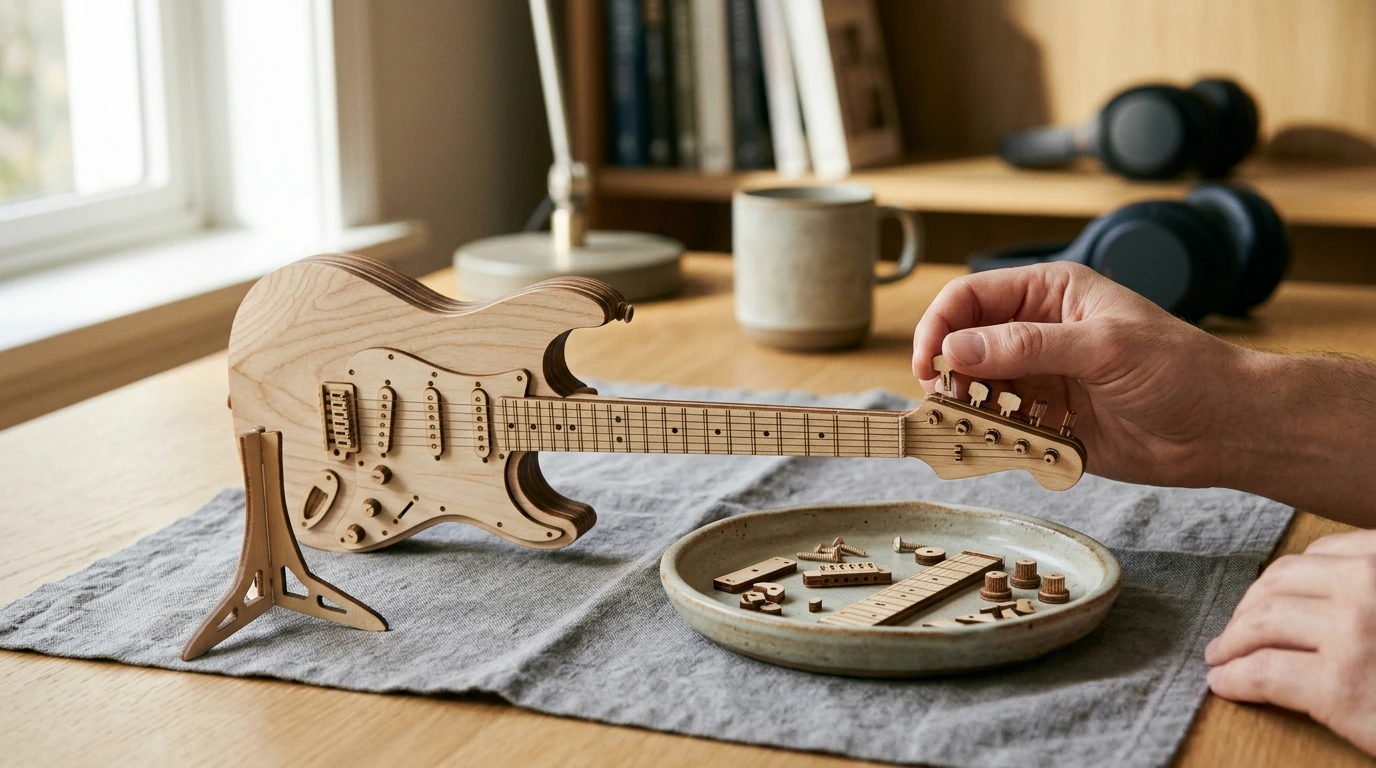
Electric Guitar 3D Wooden Puzzle Kit: A Buildable Mini Instrument for Desks, Shelves, and Gift Moments
Bring a little stage energy to a calm, hands-on project. Our Electric Guitar 3D Wooden Puzzle Kit is a small wooden build that turns a few focused minutes into a display piece—great for music lovers, makers, and anyone who enjoys screen-free hobbies. It’s the kind of kit that fits easily into a gift bag, a weekend activity, or a “one more piece” break after work.
Why an electric-guitar model makes a satisfying wooden build
Mini instrument builds hit a sweet spot: instantly recognizable, fun to assemble, and easy to place once you’re done.
- Recognizable shape with rewarding milestones: the neck, body, and stand come together in clear stages, so progress feels steady.
- Small footprint, big personality: a guitar silhouette reads instantly on a shelf, even at miniature scale.
- A music-themed gift that isn’t generic: it works for guitar players, band kids, and anyone with a playlist-first personality.
- A mindful project without a big mess: wooden puzzle kits keep the activity focused—sort, assemble, and display.
If you want a bit of background on the real instrument’s place in music history, Encyclopaedia Britannica’s overview of the electric guitar is a solid reference.
What to expect during assembly
Our team’s best advice: treat the build like a tidy little work session. A small model can still have small parts, and organization is what keeps it relaxing.
- Set up a “parts landing zone”: a shallow tray or plate helps prevent small pieces from wandering.
- Dry-fit first, then press to seat: align tabs/slots before applying pressure so pieces sit cleanly.
- Work from larger structures to smaller details: assembling the main body and neck first makes the remaining steps easier to handle.
- Keep hands comfortable: short breaks reduce accidental bends and help maintain clean alignment.
- If a piece feels tight: re-check orientation and edges rather than forcing; steady pressure beats sudden force.
Tools and workspace tips (simple, optional, and practical)
You don’t need a full craft bench for a wooden puzzle kit—just a few basics that make alignment and handling easier.
- Light + flat surface: good lighting helps you spot slot alignment quickly.
- Fine nail file or a small piece of sandpaper: if an edge is slightly rough, use light strokes and test-fit again.
- Tweezers: helpful for tiny parts if your fingers feel clumsy near the end of the build.
- Soft cloth under the project: reduces slipping while you press pieces together.
- If children are helping: keep small parts in a dish and supervise closely to prevent loss or accidental swallowing.
For safety guidance around small components, you can review the U.S. Consumer Product Safety Commission notes on choking hazards from small parts.
Display ideas: from desk décor to gift-ready presentation
The best part of a mini build is that it doesn’t need a whole room to feel special. A few intentional placement choices make it look like it belongs.
- Desk stage: place it next to speakers, a headphone stand, or a vinyl shelf for an instant “music corner.”
- Bookshelf accent: use it as a small object between stacked books or beside a framed photo.
- Band-room motivation: a fun reward build after practice, recital prep, or lesson milestones.
- Gift upgrade: pair it with a handwritten setlist, concert ticket stub, or a short note about a favorite song.
- Mini collection theme: display it near other small models to create a curated “maker shelf.”
Personalizing the finished guitar (keep it clean and durable)
Personalization is where a simple build turns into “your” build. Keep it light and intentional so the silhouette stays crisp.
- Color accents: use light coats of markers or paint pens to add stripes, pickguard-style blocks, or fret markers.
- Go subtle first: test color on an unseen edge before committing to bold sections.
- Seal carefully (optional): a clear, craft-friendly topcoat can help protect color—allow full dry time before handling.
- Nameplate idea: add a tiny paper or cardstock “tour pass” plaque on the base for a custom look.
- Keep the silhouette readable: a few well-placed details often look better than full coverage.
At-a-glance details
| Item | Details |
|---|---|
| Product | Electric Guitar 3D Wooden Puzzle Kit |
| Price | $13.51 USD |
| Availability | In stock |
| Best for | Music-themed gifting, desk décor, screen-free building |
If you’re putting together a small “gift moment,” our team also keeps a few easy add-ons in stock—handy when you’re bundling items for someone with a busy schedule or a commute to lessons or rehearsals: Universal Car Steering Wheel Phone Mount for Safe Navigation, Triple-Sided Ultra-Fine Soft Bristle Toothbrush, and Armani Exchange Men’s Sneakers.
Who it’s best for (and when to choose a different kind of kit)
FAQ
Is the Electric Guitar 3D Wooden Puzzle Kit suitable for kids?
It can be a fun family activity, especially when you build together and share the sorting/assembly steps. Because small parts may be present, we recommend adult supervision and choosing what’s age-appropriate for your household.
Do extra tools or glue need to be used?
Many wooden puzzle kits are tab-and-slot builds, so it’s best to start without glue and focus on careful alignment and gentle pressure. Optional helpers like a nail file/sandpaper (for a snug edge) or tweezers (for tiny pieces) can make the process smoother.
What’s a good way to make the finished model look more custom?
Keep customization simple: add a few paint-pen or marker accents (like stripes or fret markers), then let it fully dry before handling. You can also create a themed display area—your “music corner”—or include a short setlist-style note when gifting.
Recommended for you

Was this article helpful?
Yes
No









Leave a comment