-
Shop
- Advanced Technologies
- AI Skills for Creators & Freelancers
- AI Client Management
- AI Ethics
- AI Mindset
- AI Tools & Prompts
- AI Writing & Content Creation
- Audio, Voice & Music
- Design & Visual Creation
- Email, Messaging & Communication
- Freelancing & Business
- Marketing, Ads & Conversion
- Productivity, Workflow & Automation
- SEO & Search Optimization
- Social Media Content & Growth
- Strategy, Planning & Analytics
- Video Creation & Editing
- AI Skills Mastery 2026 Collection
- Bathroom
- Best-Sellers
- Car Accessories
- Confidence
- Dating & Social Skills
- Digital Resources
- Easter Products
- Education & Learning
- Family & Parenting
- Fashion
- Fashion Accessories
- Furniture
- Gadgets
- Health & Beauty
- Health & Wellness
- Home & Garden
- Home Electronics
- Home Supplies
- Jewelry
- Kids & Babies
- Kitchen
- Lighting
- Patio, Lawn & Garden
- Personal Growth
- Pet Care
- Pet Supplies
- Pets
- Shoes
- Smart Home Living Guides
- Sport & Outdoors
- Stress Relief & Relaxation
- Super Deals
- TikTok Growth & Monetization Mastery
- Travel
- Travel & Adventure
- Wealth
- Wellness
Dog Nail Trimming at Home: Tools, Tips & Safe Steps
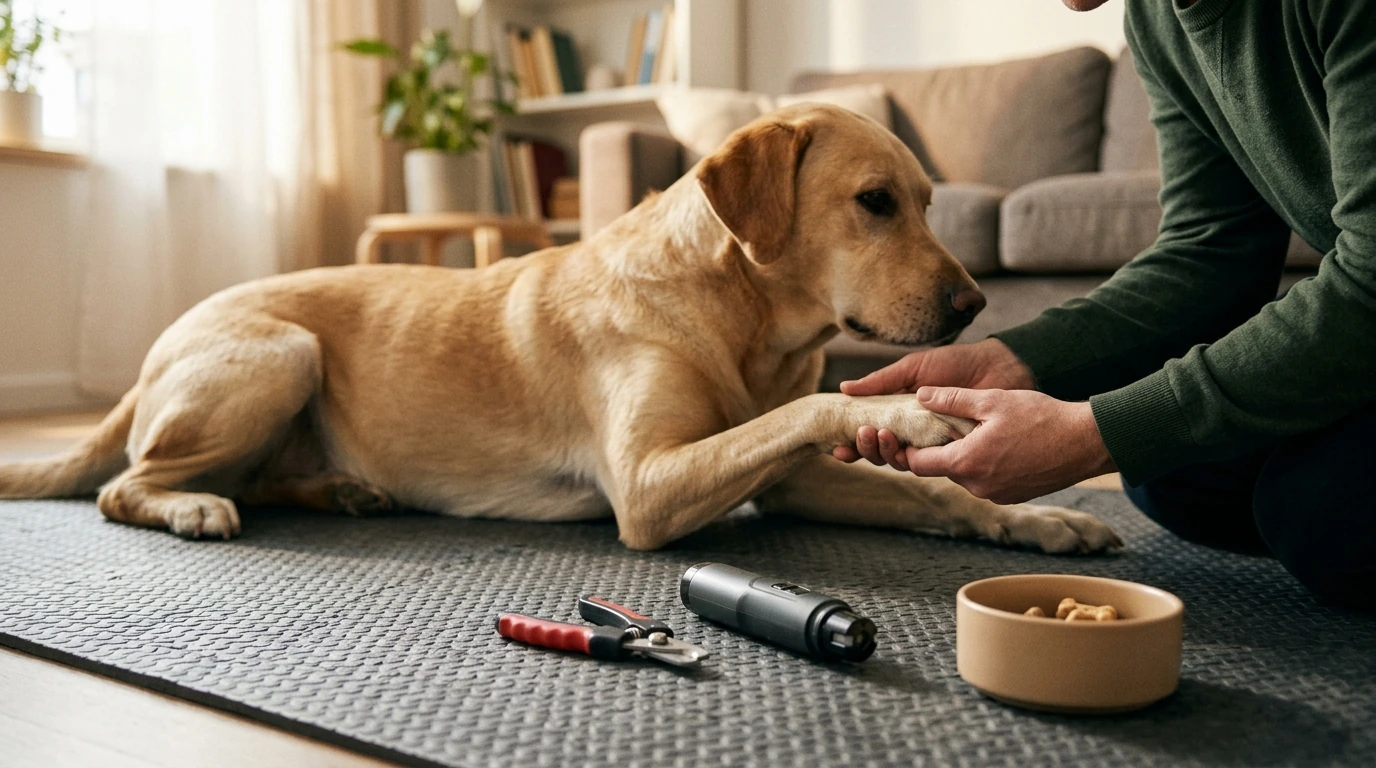
Dog Nail Trimming Guide: Expert Tips, Tools, and Techniques for Healthy Paws
Regular nail care helps dogs move naturally, protects joints and paw pads, and reduces the chance of painful splits. With a calm setup, the right tools, and a steady step-by-step method, many dogs can learn to tolerate (and sometimes relax during) nail trims at home. For additional basics and safety reminders, reputable references like the American Kennel Club and VCA Animal Hospitals offer helpful overviews. For more guidance, see A pet parent’s guide to nailing nail trims.
Why nail length matters for comfort and movement
When nails get too long, a dog’s weight distribution shifts. Instead of the toe pads bearing the load, the nail tips start contacting the ground first, subtly changing posture and adding stress through the toes and up into the wrists, elbows, and shoulders. For further reading, see Dog Grooming Tips.
Signs nails are too long
- Clicking on hard floors
- Slipping or scrambling for traction
- Splayed toes or toes pushed sideways by nail length
- Snagging on carpet, blankets, or upholstery
- Hesitant walking, especially on smooth surfaces
Risks of overgrowth
- Cracked or split nails that expose sensitive tissue
- Torn nails (sometimes reaching the nail bed)
- Infected nail beds after breaks or repeated licking
- Dewclaws curling into the skin if left unchecked
Indoor dogs often need more frequent trims because carpets and smooth floors don’t naturally wear nails down. Outdoor dogs may wear nails on sidewalks and rough terrain, but dewclaws typically still need regular attention.
Know the anatomy: nail, quick, and safe trimming zones
The “quick” is the living core inside the nail that contains blood vessels and nerves. Cutting into it hurts and causes bleeding—so the goal is to remove excess nail while staying shy of the quick.
Clear/white nails vs. black nails
With clear or white nails, the quick is often visible as a pink center, making it easier to judge where to stop. Black nails hide the quick, so the safest approach is to trim in tiny amounts and read the nail’s cross-section as you go.
How to trim black nails safely
- Use bright light and take paper-thin slices.
- Look for a pale or chalky gray oval in the center as you get close.
- When a darker dot appears inside that center, treat it as a stop signal.
If your dog’s quicks are long (common in dogs who haven’t had regular trims), stop early and continue another day. With consistent micro-trims, the quick can gradually recede over time.
Puppy nails vs. adult nails
Puppy nails are sharper and thinner, and many puppies accept handling more easily when training starts early. Adult nails are thicker and can splinter if tools are dull—sharp blades and gentle technique matter.
Tools that make trims easier (and when to use each)
The right equipment reduces stress for both you and your dog. Before starting, gather everything in reach so you don’t have to let go mid-trim.
Nail trimming tools at a glance
| Tool | Best for | Pros | Watch-outs |
|---|---|---|---|
| Scissor-style clippers | Most dogs; quick trims | Fast; strong leverage; widely available | Dull blades can crush/split nails; choose correct size |
| Guillotine clippers | Small dogs; thinner nails | Simple design; compact | Incorrect angle can split nails; blades wear out |
| Grinder | Black nails; smoothing; anxious dogs | Controlled removal; rounded finish | Noise/vibration; heat buildup—use short touches |
| Styptic powder/gel | Accidental quick cuts | Stops bleeding quickly | Can sting; apply pressure and stay calm |
- Non-slip mat: helps your dog feel secure and reduces sudden jerks.
- Good lighting: makes it easier to read nail color changes as you approach the quick.
- High-value treats: reserve something extra special for nail days.
Related items you can keep on hand
- Dog Nail Trimming Guide: Expert Tips, Tools, and Techniques for Healthy Paws
- Triple-Sided Ultra-Fine Soft Bristle Toothbrush for Enhanced Oral Health
Calm handling and training: set up for cooperation
Trims go better when your dog starts below their stress threshold. Choose a quiet spot, a stable surface, and a time when your dog is naturally calmer (after a walk or play).
Desensitization steps (reward each step)
- Touch the paw briefly, then treat.
- Hold the paw for a second or two, then treat.
- Tap a nail with the tool (no cutting), then treat.
- Trim one nail tip, then treat and take a break.
For dogs with low tolerance, a “one paw per session” plan can build consistency without turning trims into a wrestling match.
Body language that says “pause”
- Whale eye (showing the whites of the eyes)
- Lip licking, yawning, or sudden stillness
- Paw pulling, leaning away, or stiffening
Step-by-step nail trimming technique (clippers and grinder)
1) Prep and inspect
2) Clipper method (steady, tiny cuts)
3) Grinder method (touch-and-lift)
If bleeding happens: quick, calm first aid
Trim schedule, special cases, and when to seek professional help
FAQ
How often should a dog’s nails be trimmed?
Most dogs need trims every 2–4 weeks. If you hear clicking on floors, notice slipping, or see dewclaws lengthening quickly, it’s time to trim sooner.
How can black nails be trimmed safely without hitting the quick?
Trim paper-thin slices under bright light and watch the nail’s center as you go. Stop when you see a chalky gray center with a darker dot, and consider using a grinder for extra control.
What should be done if the quick is accidentally cut?
Apply styptic powder or gel and hold firm pressure for 30–60 seconds while keeping your dog still. Contact a veterinarian if bleeding continues after several minutes of consistent pressure or if the nail is torn into the nail bed.
Recommended for you


Was this article helpful?
Yes
No









Leave a comment