-
Shop
- Advanced Technologies
- AI Skills for Creators & Freelancers
- AI Client Management
- AI Ethics
- AI Mindset
- AI Tools & Prompts
- AI Writing & Content Creation
- Audio, Voice & Music
- Design & Visual Creation
- Email, Messaging & Communication
- Freelancing & Business
- Marketing, Ads & Conversion
- Productivity, Workflow & Automation
- SEO & Search Optimization
- Social Media Content & Growth
- Strategy, Planning & Analytics
- Video Creation & Editing
- AI Skills Mastery 2026 Collection
- Bathroom
- Best-Sellers
- Car Accessories
- Confidence
- Dating & Social Skills
- Digital Resources
- Easter Products
- Education & Learning
- Family & Parenting
- Fashion
- Fashion Accessories
- Furniture
- Gadgets
- Health & Beauty
- Health & Wellness
- Home & Garden
- Home Electronics
- Home Supplies
- Jewelry
- Kids & Babies
- Kitchen
- Lighting
- Patio, Lawn & Garden
- Personal Growth
- Pet Care
- Pet Supplies
- Pets
- Shoes
- Smart Home Living Guides
- Sport & Outdoors
- Stress Relief & Relaxation
- Super Deals
- TikTok Growth & Monetization Mastery
- Travel
- Travel & Adventure
- Wealth
- Wellness
Best Time to Microchip Your Pet: Checklist & Tips
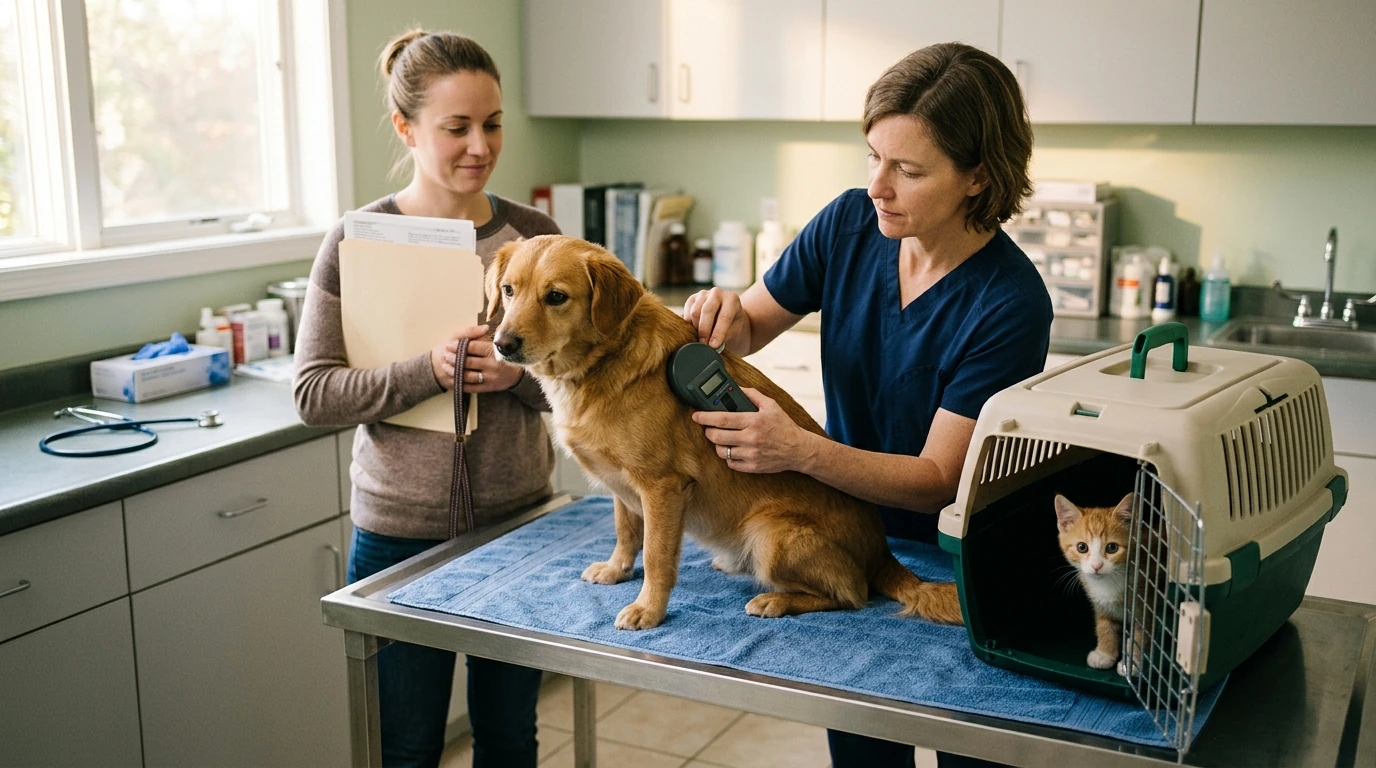
Pet Microchip Timing Made Simple: Essential Checklist for Microchipping Your Pet
Microchipping is one of the simplest ways to connect a lost pet with their family—when it’s done at the right time and the registration details stay current. Use the timing guide and checklist below to decide when to microchip, what to do at the appointment, and how to keep the chip information working for the life of your pet. For more guidance, see 5 Things You Need to Know About Microchipping Your Pet.
What a Microchip Does (and What It Doesn’t)
A microchip is a small implant that carries an ID number that can be read by a scanner at shelters and veterinary clinics. When a pet is found, that ID number is used to locate the registry record tied to the chip so the owner (or listed contacts) can be called. For further reading, see Fact sheet: Microchip basics – HumanePro.
It’s also important to know what microchipping can’t do. A microchip is not a GPS tracker; it does not show live location and does not require charging. It’s a permanent form of identification, not a real-time locator.
The biggest “make-or-break” factor is the registration record. Outdated phone numbers and addresses are a common failure point, so the chip is only as effective as the information attached to it.
Microchips complement collars and ID tags. Visible ID often gets the fastest call home, while the microchip is the backup when collars slip off, break, or are removed.
For additional guidance from veterinary organizations, see the American Veterinary Medical Association (AVMA) overview of microchipping and the AAHA Microchip Registry Lookup.
Best Timing: When to Microchip Puppies, Kittens, and Adult Pets
Puppies and kittens are often microchipped when they’re young, commonly during early veterinary visits or at the time of spay/neuter, depending on local practices and your veterinarian’s guidance. The advantage of early microchipping is simple: identification is in place before the “bold and curious” phase fully kicks in.
For adopted pets, confirm at pickup whether a chip is already implanted; if not, schedule microchipping promptly before the pet fully settles into new routines. The first days in a new home are a high-risk period for door-dashing, fence-testing, and slipping out while visitors come and go.
Adult pets can be microchipped at the next convenient wellness visit—especially for newly acquired pets, outdoor cats, dogs that hike/travel, or any pet with a history of slipping collars or bolting. Senior pets can still benefit too, particularly if hearing/vision decline or cognitive changes could lead to wandering.
Fastest rule of thumb: if a pet could get out today, microchipping should not wait for a “perfect” date.
Timing Guide: Common Moments to Schedule Microchipping
| Situation | Why It Matters | Suggested Timing |
|---|---|---|
| New puppy/kitten | Early identification before adventurous phases begin | At an early vet visit; often paired with routine care |
| Spay/neuter appointment | Single visit for multiple procedures; convenient follow-up schedule | Discuss with the clinic when booking surgery |
| Newly adopted or rehomed | Highest risk of escape while adjusting | Within the first 1–2 weeks (or immediately if possible) |
| Before travel or boarding | Higher chance of separation in unfamiliar places | At least 2–3 weeks before the trip to allow registration confirmation |
| After moving homes | Old address/phone reduces reunification success | Update registration before move day; verify right after |
| Outdoor access begins | More exposure to getting lost or picked up | Microchip before the first unsupervised outdoor time |
Microchipping Appointment Checklist: Before, During, After
Before the visit
Bring any adoption paperwork, previous microchip numbers, and the breeder/shelter information if applicable. If your pet came from a rescue, ask whether they were chipped before transport or during intake.
Confirm the clinic will scan for an existing chip before placing a new one. Pets can occasionally have a chip already, and duplicates can complicate records and ownership transfers later.
During the appointment
Ask the clinic to show the microchip number on paperwork and confirm the brand/registry information used for enrollment. That number is the key to everything, so treat it like a title document: accurate, legible, and saved.
Request a full-body scan after placement to confirm the chip reads properly. This quick step helps verify the chip is functioning and detectable.
After you leave
Register the chip immediately (same day if possible) and keep a screenshot or printed confirmation of the registration completion. Add at least two phone numbers (primary + backup) and a working email; a trusted friend/relative as an alternate contact can be a lifesaver if you’re traveling or unreachable.
Registration and Updates: The Part That Makes Microchipping Work
Special Situations That Change the Timing
Ongoing Maintenance: Keep the Microchip Findable for Life
Printable Checklist to Keep on the Fridge
Helpful Items You Can Add to Your Prep
- Pet Microchip Timing Made Simple: Essential Checklist for Microchipping Your Pet (digital-friendly reference you can save and revisit after moves, travel, or phone-number changes)
- Universal Car Steering Wheel Phone Mount for Safe Navigation (useful for hands-free directions to a vet, shelter, or evacuation site when time matters)
FAQ
Is microchipping painful for pets?
For most pets, it feels similar to a quick injection with brief discomfort. If your pet is anxious or reactive, your veterinary team can suggest handling and comfort options to keep the visit calmer.
Can a pet have more than one microchip?
Yes, it can happen, especially when a prior chip wasn’t detected or paperwork was missing. Scanning first helps avoid duplicates, and the most important step is ensuring at least one active registry record has correct, current-owner contact information.
How soon does a microchip work after placement?
A microchip can typically be read right away with a scanner, but it only helps reunification once registration is completed and your contact details are accurate. Registering the same day closes that gap.
Recommended for you



Was this article helpful?
Yes
No








Leave a comment