-
Shop
- Advanced Technologies
- AI Skills for Creators & Freelancers
- AI Client Management
- AI Ethics
- AI Mindset
- AI Tools & Prompts
- AI Writing & Content Creation
- Audio, Voice & Music
- Design & Visual Creation
- Email, Messaging & Communication
- Freelancing & Business
- Marketing, Ads & Conversion
- Productivity, Workflow & Automation
- SEO & Search Optimization
- Social Media Content & Growth
- Strategy, Planning & Analytics
- Video Creation & Editing
- AI Skills Mastery 2026 Collection
- Bathroom
- Best-Sellers
- Car Accessories
- Confidence
- Dating & Social Skills
- Digital Resources
- Easter Products
- Education & Learning
- Family & Parenting
- Fashion
- Fashion Accessories
- Furniture
- Gadgets
- Health & Beauty
- Health & Wellness
- Home & Garden
- Home Electronics
- Home Supplies
- Jewelry
- Kids & Babies
- Kitchen
- Lighting
- Patio, Lawn & Garden
- Personal Growth
- Pet Care
- Pet Supplies
- Pets
- Shoes
- Smart Home Living Guides
- Sport & Outdoors
- Stress Relief & Relaxation
- Super Deals
- TikTok Growth & Monetization Mastery
- Travel
- Travel & Adventure
- Wealth
- Wellness
14mm Skoda Key Emblem Sticker Decals (10-Pack)
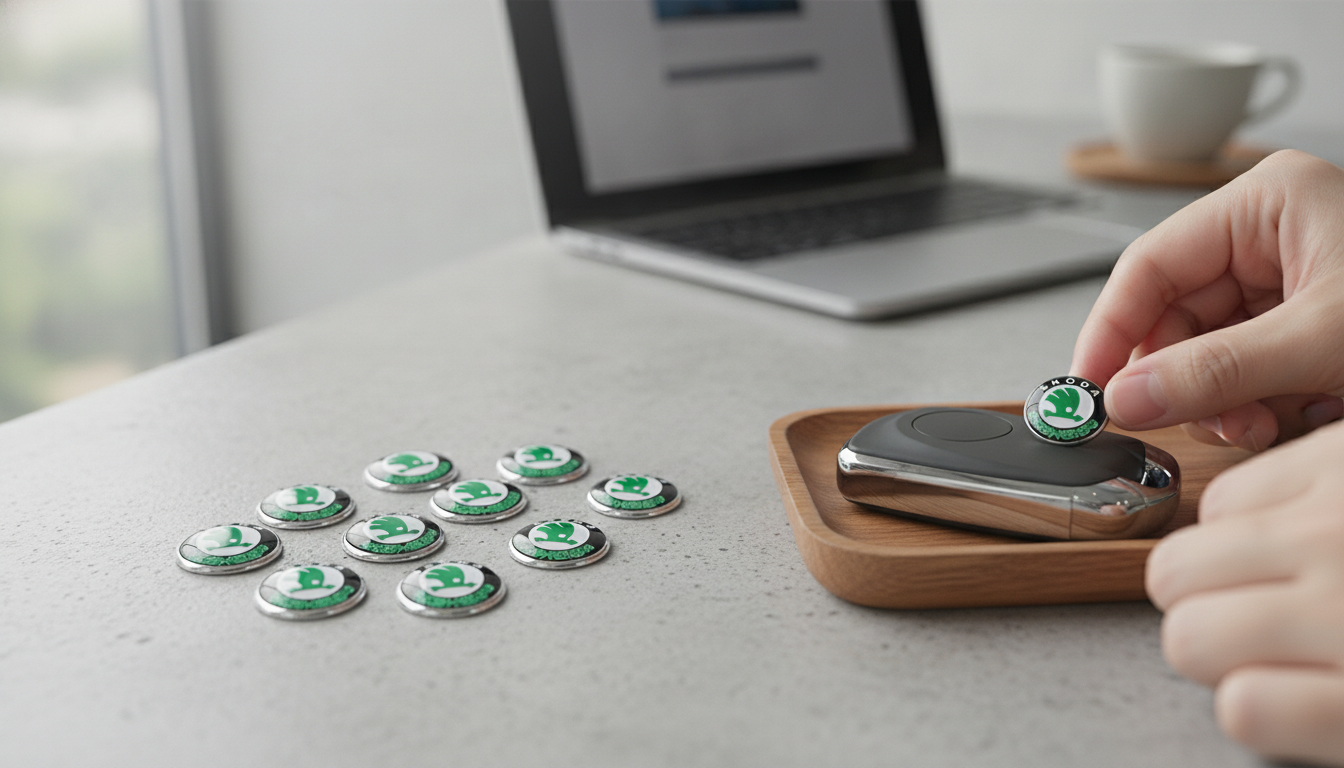
A worn or missing badge on a remote key can make it look older than it is and harder to identify at a glance. A small 14mm emblem decal refreshes the appearance quickly and keeps multiple keys looking consistent—useful for daily drivers, spare keys, and family sets. If your Skoda fob still works perfectly but the logo area looks scuffed, faded, or empty, a simple emblem sticker can be a fast cosmetic reset without the hassle of swapping shells or dealing with programming.
What These 14mm Key Emblem Decals Are
These are small, round emblem-style stickers sized at 14mm—made to fit many Skoda remote key badge recesses. They’re intended to cover cosmetic wear like scratched surfaces, a dulled logo, or a missing insert, helping the key look clean and complete again without replacing the entire housing.
Because they come in a pack of 10, they’re practical for households with multiple keys, shared vehicles, or anyone who wants a few backups for future touch-ups. They’re best used for appearance and quick identification, not for fixing cracks, broken buttons, or separating key halves.
Fit and Compatibility Checklist (Measure Before Applying)
Before peeling and sticking, take a moment to confirm the fit. Measuring first helps avoid overhang, gaps, and misalignment—especially when different Skoda key generations may have slightly different badge pockets.
| Check | What to do | Why it matters |
|---|---|---|
| Diameter | Measure the emblem circle (edge to edge) | Prevents overhang or gaps |
| Surface type | Confirm smooth/clean area; note deep recesses | Improves adhesion and alignment |
| Wear level | Look for peeling coating, oils, or cracking | Determines how much prep is needed |
| Environment | Consider heat, sun, and pocket abrasion | Sets realistic durability expectations |
Decals typically adhere best to clean, flat surfaces or lightly recessed badge pockets. If the key face is rubberized, deeply textured, or coated in a soft-touch finish that’s breaking down, adhesion may be reduced—so surface prep matters more.
Installation Steps for a Bubble-Free Finish
A careful install is what makes a small detail look “factory” instead of “stuck on.” The goal is a centered placement with clean edges and no trapped air.
- Clean thoroughly: Remove skin oils and residue. Let the area dry completely before placement.
- Do a dry alignment: Hover the decal over the center point to confirm positioning before committing.
- Apply from center outward: Press gently, smoothing toward the edges to avoid bubbles.
- Hold pressure briefly: A steady press helps the adhesive bond—especially around the rim.
- Give it time: Avoid immediate pocket abrasion so the adhesive can set.
If alignment is slightly off, having extras in the pack makes it easier to redo the install and get a cleaner result.
Where a Pack of 10 Helps Most
A multi-pack isn’t just about quantity—it’s about convenience. It’s common to have more than one key in circulation, and mismatched, worn badges can make keys feel inconsistent even when they function the same.
- Multiple keys at home: Main key, spare key, and backup keys can match for a uniform look.
- Redo-friendly: If the first placement isn’t centered, you can try again without waiting for another order.
- Shared vehicles or fleets: Consistent key appearance helps quick identification during handoffs.
- Resale prep: Small cosmetic fixes can make the handover feel cleaner and more complete.
Care Tips to Keep the Decal Looking New
Keys take daily abuse—pockets, bags, console trays, and keyrings with other metal items. A little care can help the emblem stay sharp-looking longer.
- Skip harsh solvents: Clean with a lightly damp cloth rather than aggressive cleaners.
- Limit abrasion: Keeping keys away from coins, tools, or sharp-edged accessories reduces scratching.
- Manage heat exposure: Extreme heat can soften some adhesives, so avoid leaving keys baking on a dash when possible.
- Address lifting early: If an edge starts to lift, clean the area and press it down promptly to keep dirt from working underneath.
When a Sticker Is Enough—and When a Full Replacement Makes Sense
A decal is the right move when the key functions normally and the only issue is cosmetic wear in the badge area. It’s a quick, low-cost refresh that can make a frequently used key feel newer.
Consider a replacement shell if the casing is cracked, seams are separating, or the buttons are torn—those issues affect daily usability and protection. Consider full key replacement if the electronics are unreliable, the remote signal drops out, or the blade/transponder is damaged. For general anti-theft and ownership guidance, resources like NHTSA can be helpful, and model-specific support is often available through Skoda owner resources. For real-world replacement expectations, Consumer Reports also covers key fob replacement considerations.
In-Stock Picks for a Quick Upgrade
- 14mm Car Remote Key Sticker Emblem Decal for Skoda – Pack of 10 (a simple cosmetic fix to restore a clean logo area across multiple keys).
- Universal Car Steering Wheel Phone Mount for Safe Navigation (helpful for hands-free navigation when parked and setting your route before driving).
FAQ
How much is it to replace a remote car key?
Replacement costs vary widely by vehicle and key type: basic remotes are often lower cost, while transponder keys and smart keys can cost significantly more once programming is included. Dealers typically charge more than automotive locksmiths, and programming fees are often a major part of the total. A cosmetic decal won’t replace programming needs, but it can delay a replacement if the key still functions.
Can a remote car key be replaced?
Yes—remote car keys can generally be replaced through a dealership or an automotive locksmith. You’ll usually need proof of ownership and the correct key type for the vehicle, and many replacements require programming to the car. If the remote works fine and only looks worn, a decal can be a quick refresh before pursuing a full replacement.
Recommended for you


Was this article helpful?
Yes
No









Leave a comment